Introduction
When designing a multi-level home or building, drawing accurate stairs on a floor plan is crucial. Stairs connect different floors and create a functional, safe flow of movement. Whether you’re an architect, interior designer, or DIY enthusiast, understanding how to draw stairs on a floor plan can make a significant difference in your project. This guide will take you through the step-by-step process of drawing stairs, including tips on tools, measurements, and key design elements.
Understanding Stair Design Basics
Before diving into the drawing process, it’s essential to understand the different types of stairs and their components. There are several stair designs, each requiring specific considerations:
- Straight Stairs: The simplest form, with no turns, typically used in smaller spaces.
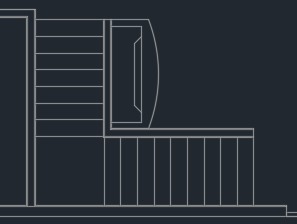
- L-shaped Stairs: These have a 90-degree turn and are often used in larger homes to save space.
- U-shaped Stairs: With two 90-degree turns, these stairs require a landing and are great for compact designs.
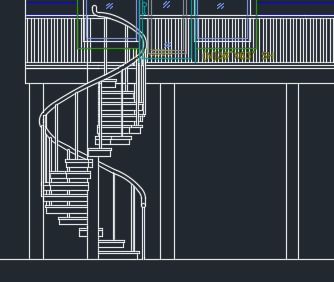
- Spiral Stairs: A space-saving option that curves around a central column, perfect for small areas.
Key Components of Stairs:
- Treads: Horizontal steps where you place your feet.
- Risers: Vertical sections that determine the step’s height.
- Landings: Flat areas between flights of stairs, often necessary for L-shaped or U-shaped designs.
- Handrails: Optional but recommended for safety.
Tools You’ll Need
To draw stairs on a floor plan accurately, you’ll need a few essential tools:
- Software Tools: AutoCAD, SketchUp, or other floor plan software are ideal for creating digital plans. These tools often come with stair design features.
- Traditional Tools: For hand-drawn plans, use graph paper, a pencil, ruler, and compass to ensure precision.
- Stair Design Calculators: These can help you calculate riser height and total steps based on your floor-to-floor measurement.
1. Determine the Staircase Location
The first step is choosing where the staircase will be placed. Consider the overall flow of the space and how it connects different areas of the building. Ensure the stairs don’t obstruct key pathways or rooms.
2. Measure the Floor-to-Floor Height
The distance between the two floors will determine the number of steps. Measure the vertical distance between the ground floor and the upper floor to calculate the total height. Accurate measurements are key to determining the riser height and total number of steps.
3. Calculate the Number of Steps
A standard riser height is typically between 7–8 inches (175–200mm). Use the following formula to calculate the number of steps:
Number of Steps = Floor-to-Floor Height ÷ Riser Height
For example, if your floor-to-floor height is 10 feet (120 inches), you would need approximately 15 steps (120 ÷ 8 = 15).
4. Drawing the Staircase
Now, start drawing the staircase based on the type you’ve selected. Here’s how to approach the most common stair designs:
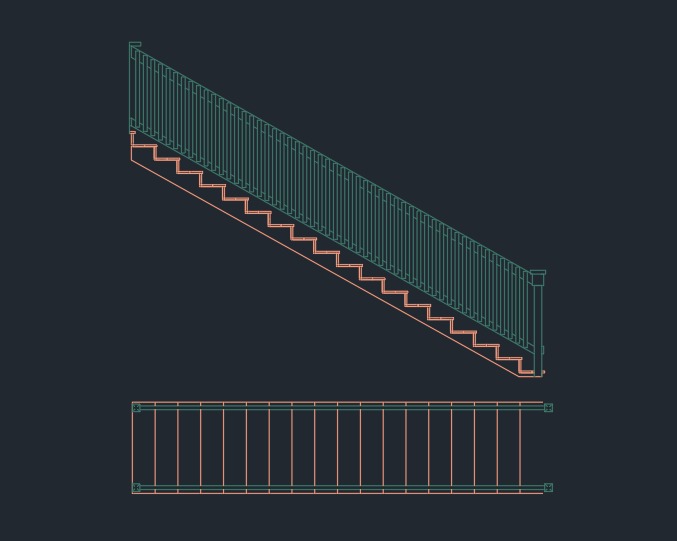

5. Indicate Stair Width
Stairs are typically 3–4 feet wide for residential spaces, but this can vary. Add a double line to your drawing to represent the width of the stairs. Ensure the width provides ample space for users.
6. Labeling the Stairs
Label your staircase design clearly, indicating the number of steps, the stair direction, and any landings. You can use annotations in your floor plan to highlight these elements.
Advanced Tips for Accurate Stair Drawing
- Ensure Accurate Rise and Run: The rise refers to the vertical height of each step, while the run refers to the horizontal depth. Make sure these measurements are consistent to ensure a comfortable and safe staircase.
- Consider Landings: For L-shaped, U-shaped, or spiral stairs, include a landing to break up the steps and improve safety.
- Building Codes Compliance: Always check local building codes to ensure your stairs meet safety and accessibility standards. Regulations may include minimum headroom, tread depth, and handrail requirements.
Common Mistakes to Avoid
- Incorrect Measurements: Always measure floor-to-floor height accurately before beginning your design. Incorrect measurements can result in an uncomfortable or unsafe staircase.
- Skipping Tread and Riser Calculations: Incorrect tread depth or riser height can make stairs steep or difficult to navigate. Stick to standard measurements unless building codes suggest otherwise.
- Neglecting Headroom Clearance: Always ensure there’s adequate headroom above the stairs, especially when creating staircases in confined spaces.
Conclusion
Drawing stairs on a floor plan is a critical skill for anyone designing multi-level spaces. Whether you’re creating a custom home design or working on a commercial building, understanding how to properly design and draw stairs ensures both safety and functionality. By following this guide, you’ll be able to create a detailed and accurate stair layout that meets design standards and building codes.
Get Expert Floor Plan Services Today!
If you need high-quality floor plans with accurate stair designs, Caddsight offers expert services tailored to your specific requirements. Whether you’re working on a residential or commercial project, we provide professional floor plan solutions that help you visualize and plan your space effectively.
Contact Caddsight now for a consultation, and let us help you create the perfect floor plan for your project.
rollsroycers.com
July 22, 2025Wow, this article is pleasant, my sister is analyzing these things, therefore I am going
to inform her.